Norway is one of those places that almost doesn’t feel real. Between the sharp mountain peaks, quiet fishing villages, and endless coastal views, it felt like every turn looked like a postcard. This trip ended up being one of the most memorable I’ve taken, not just because of the scenery, but because of how different each part of the country felt.
We traveled in the beginning of March, which meant full winter conditions, cold temperatures, snow, wind, and shorter daylight hours. While we didn’t get a full Northern Lights show, which is never guaranteed, we did catch a brief glimpse one night in Lofoten.
This guide walks through exactly what we did, but also includes everything you need to plan your own trip, how to get around, what to expect, and things I wish I knew ahead of time.
🏔️ Lofoten Islands
The Lofoten Islands are one of the most unique places I’ve ever been. Picture dramatic mountains rising straight out of the ocean, small fishing villages, and winding roads connecting it all. It’s remote, rugged, and absolutely stunning, but it does take a bit more planning to get here.
How to Get to Lofoten
There are typically no direct international flights into Lofoten, so most routes include flying into Oslo first, then taking a connecting flight north.
Common airport options:
- Evenes Airport, most common and what we used
- Leknes Airport, smaller but closer to central Lofoten
- Svolvær Airport, another regional option
From any of these airports, you’ll need to either rent a car or arrange transportation into the islands.
How We Got There
We flew into Evenes Airport, rented a car, and drove about 2.5 to 3.5 hours into Lofoten. I highly recommend this route. Having a car here makes a huge difference since everything is spread out and the drive itself is part of the experience.
🚐 Day 1 – Arrival + Drive into Lofoten
After landing in Evenes, we picked up our rental car and started the drive toward our base in Ballstad, where we stayed at Lofotveggen Panorama.
The drive itself felt like an introduction to what was coming, massive fjords, quiet roads, and viewpoints everywhere you look. We made a few stops along the way:
- Austnesfjorden (Fjord Viewpoint)
- Vanha puinen laivanhylky (Shipwreck)
- Lofoten Jewelry Workshop (Silversmith)
Even without a set itinerary, this drive alone is worth taking your time with.
🚐 Day 2 – Northern Lofoten Route
We spent this day exploring the northern part of the islands, which had a mix of beaches, small towns, and scenic hikes.
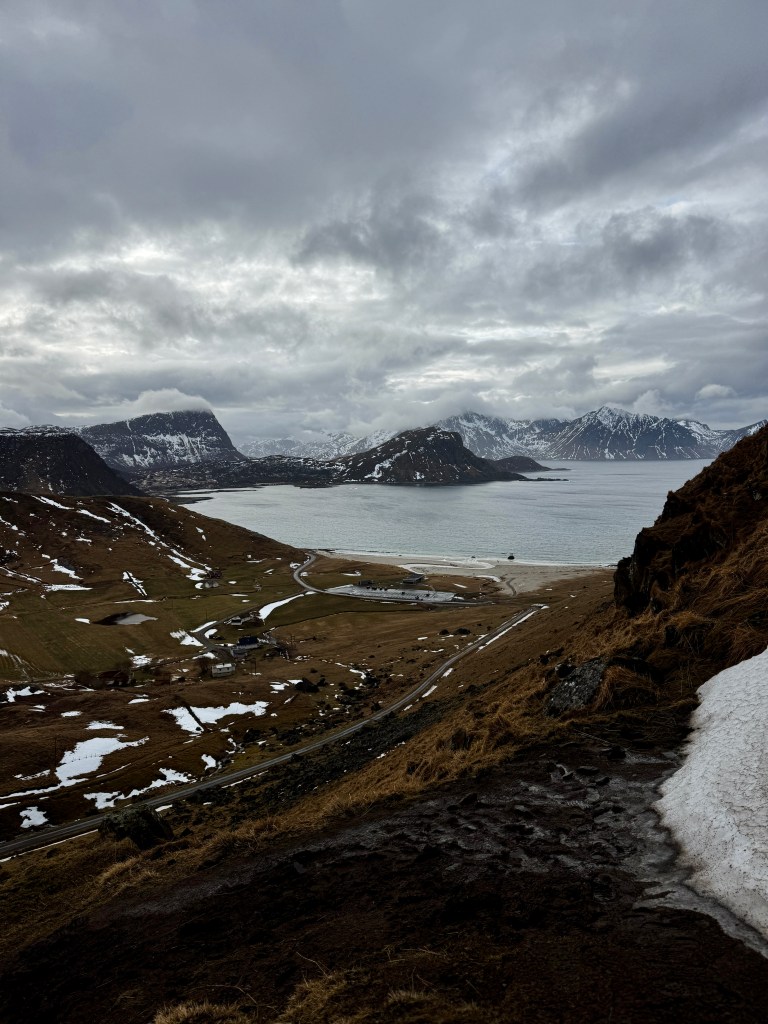
We passed through Leknes and had breakfast at Huset Kafé before heading to Vik Beach and then Haukland Beach, which is one of the most well-known beaches in Lofoten. Even in winter, the water has that bright blue color, which contrasts so much with the snow around it.
From there, we hiked up to Mannen, a short but steep hike overlooking Haukland. The views from the top were incredible, but in winter, this trail can be icy, definitely something to be prepared for.
We ended the day in Henningsvær, a small fishing village that feels like it’s sitting right on the water. It’s one of those places you just walk around and take in. You can stop by the famous Football Stadium or look over the Marina. I recommend stopping to eat at Sabina where you get a mix of Spanish and Norwegian food. Some of the best fried fish I have ever had.
🚐 Day 3 – Southern Lofoten Route
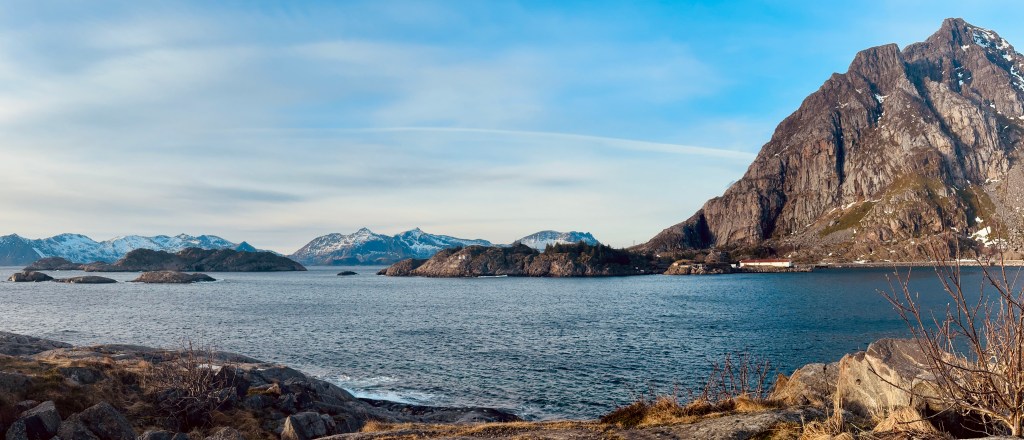
This was easily one of the most scenic days of the trip. The southern part of Lofoten has some of the most iconic viewpoints and landscapes.
We made our way through to stops:
One of the highlights was hiking toward Kvalvika Beach and Ryten. This is one of the most popular hikes in Lofoten, and for good reason, the overlook above the beach is unreal. In winter, though, conditions can be tough, so always check before heading out. Due to the wind we did not complete the entire hike, we stopped right before you would hike down o the actual beach.
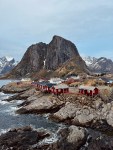
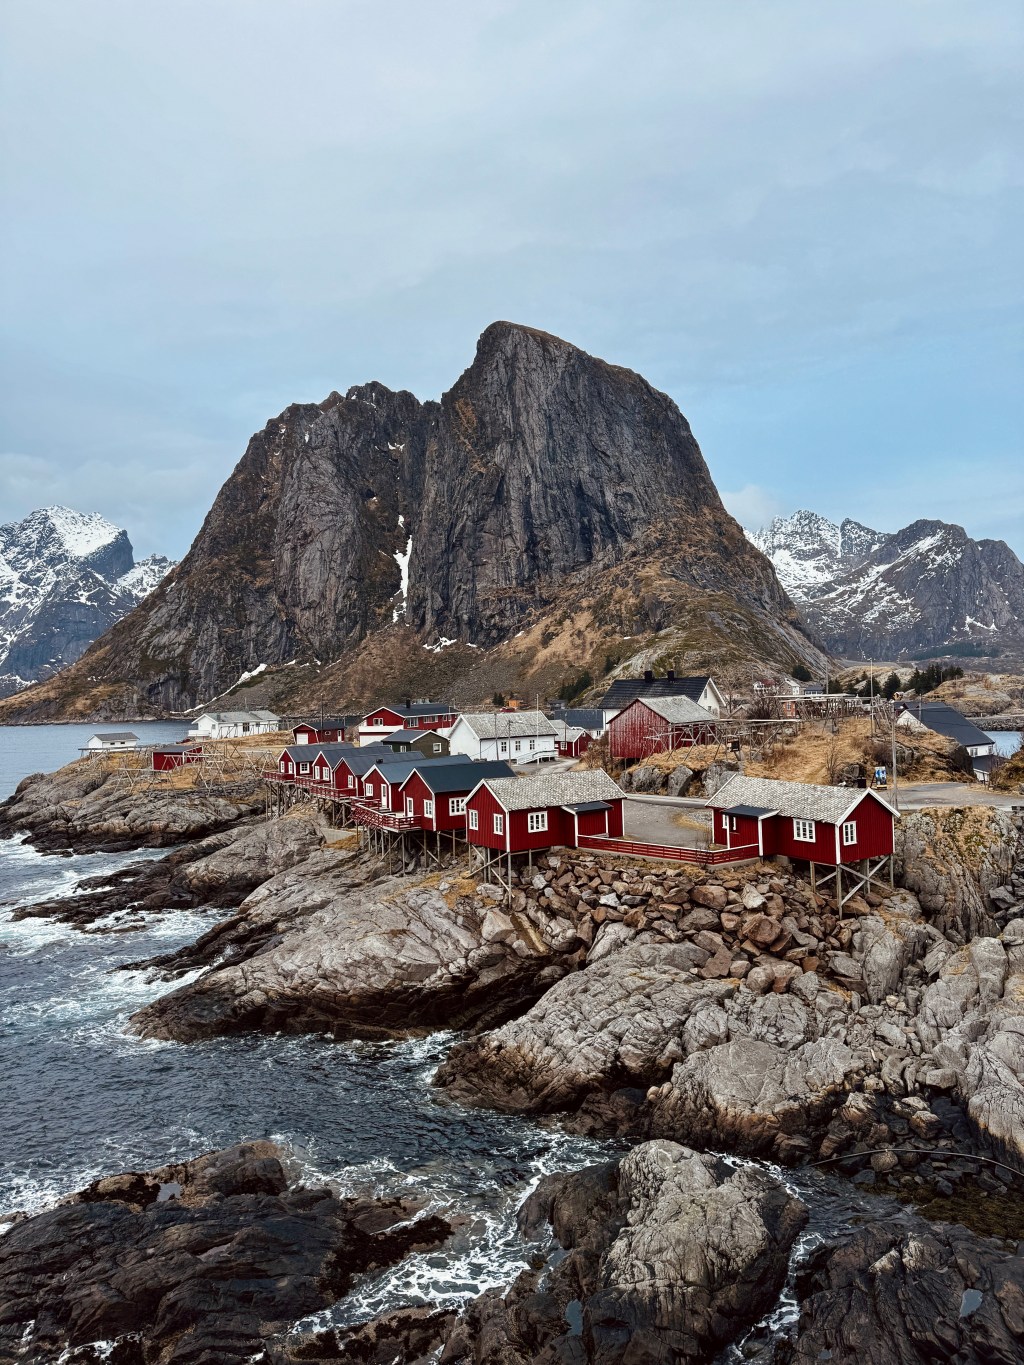
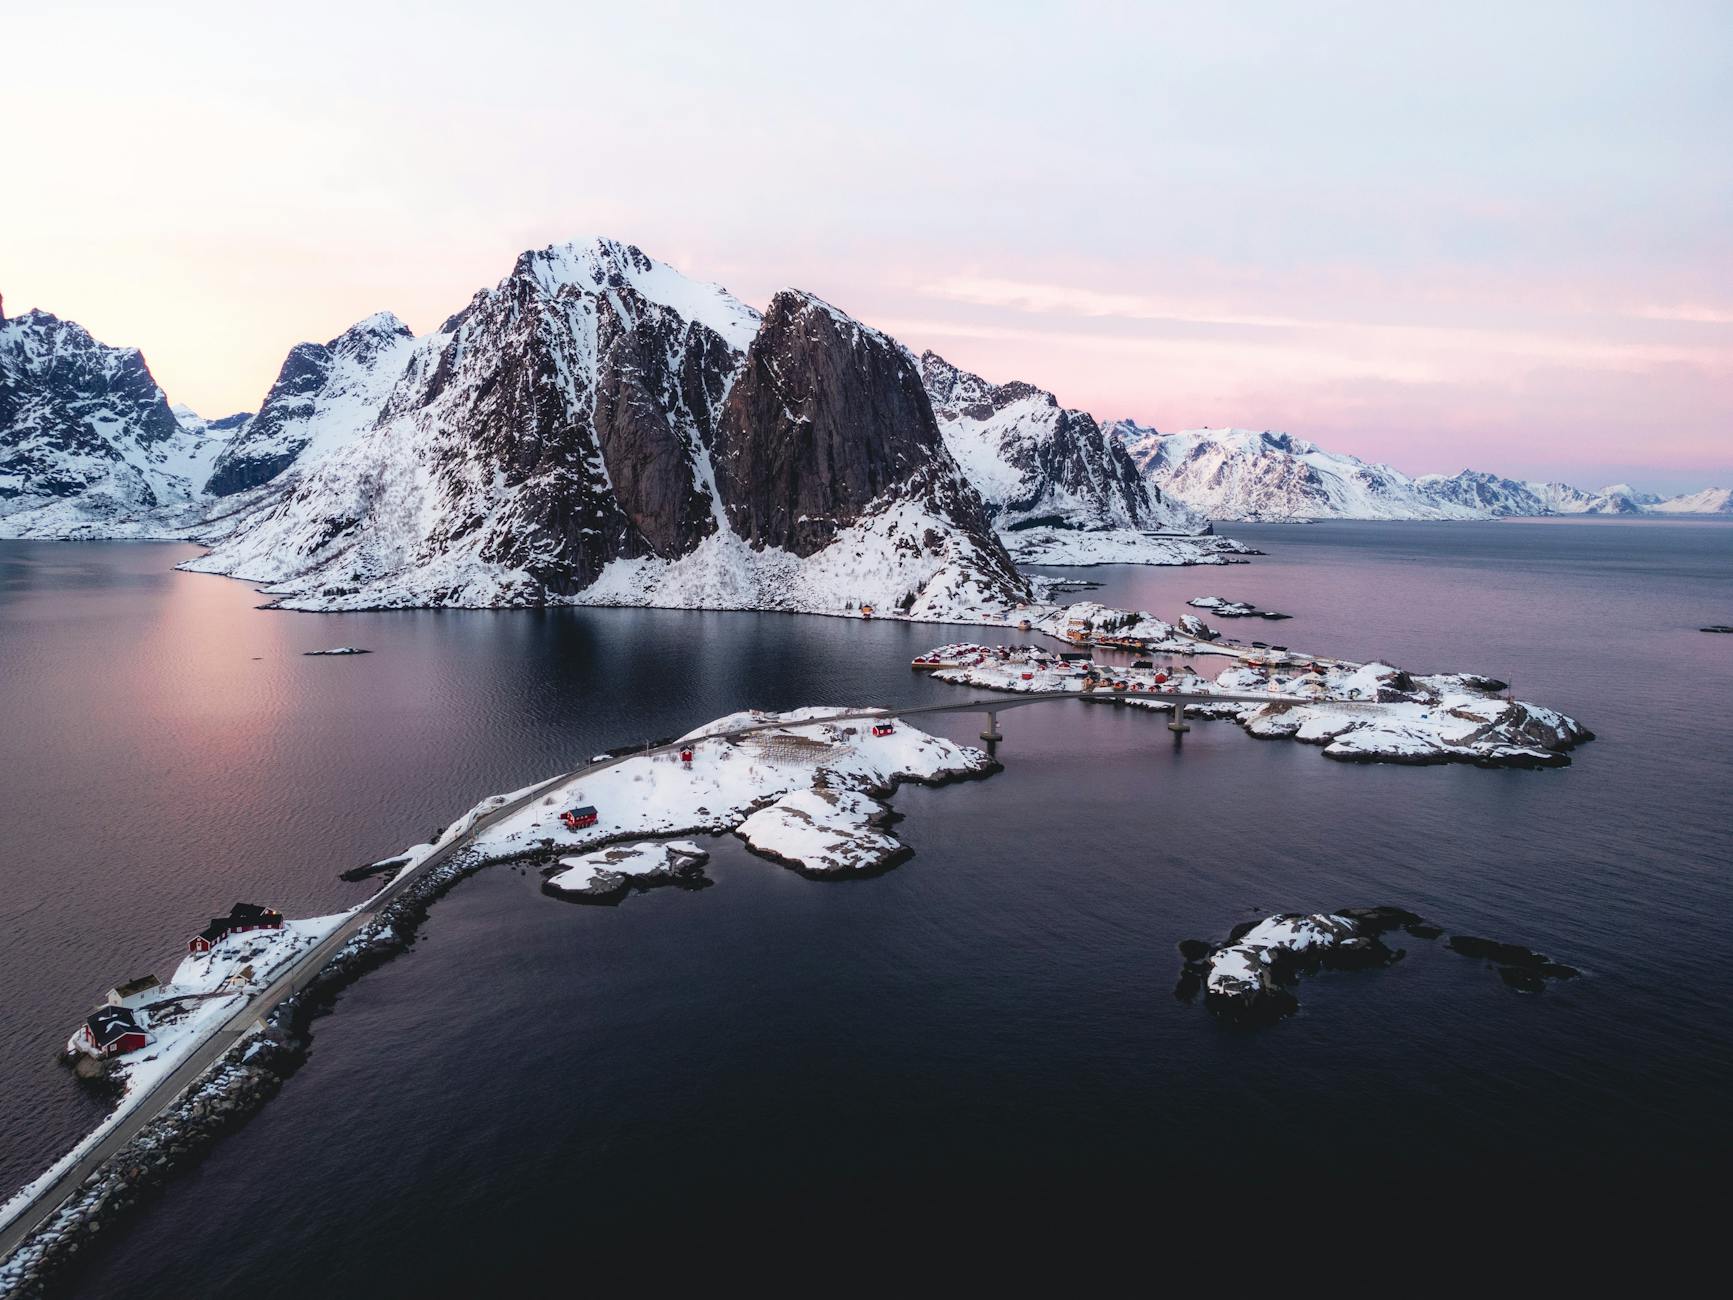
We continued on to Hamnøy, Reine, and finally Å, which is literally the end of the road in Lofoten. These stops are known for their classic red cabins and mountain backdrops, some of the most photographed spots in Norway. In these places you just simply get out, walk and explore
🚐 Day 4 – Flex Day / Weather Day
If there’s one thing I’d recommend for Lofoten, it’s building in a flex day. The weather changes constantly, and having an extra day allows you to adjust plans.
We used this day to slow down and explore Kabelvåg and Svolvær, and honestly, it was nice to take a break from the constant driving.
There are also plenty of experiences you can plan for this day depending on availability and weather, like dog sledding, reindeer experiences, or guided tours. Just keep in mind that many of these require advance booking and can get canceled due to conditions.
🌊 Stavanger
Stavanger is known for its fjords and hiking, especially as the gateway to Preikestolen, one of Norway’s most famous viewpoints.
How to Get To Stavanger
We flew from Evenes to Stavanger, which is the easiest way to cover the distance between northern and southern Norway.
You could also travel by train or ferry combinations, but flying saves a significant amount of time.
How We Got Around
We rented a car again in Stavanger, which made it easy to explore both the city and surrounding areas.
Where We Stayed
We stayed in Stavanger as our base, which worked well for accessing hikes and nearby coastal areas.
🚐 Day 5- Exploring Stavanger
Stavanger feels completely different from Lofoten, more structured, more city like, but still surrounded by nature.
We spent the day walking through Gamle Stavanger, the old town filled with white wooden houses, then stopped by the Norwegian Petroleum Museum, which gives some insight into Norway’s history.
Later, we grabbed coffee and made our way to Hellestøstranden, a coastal beach that feels very open and peaceful.
🚐 Day 6 – Hiking Pulpit Rock
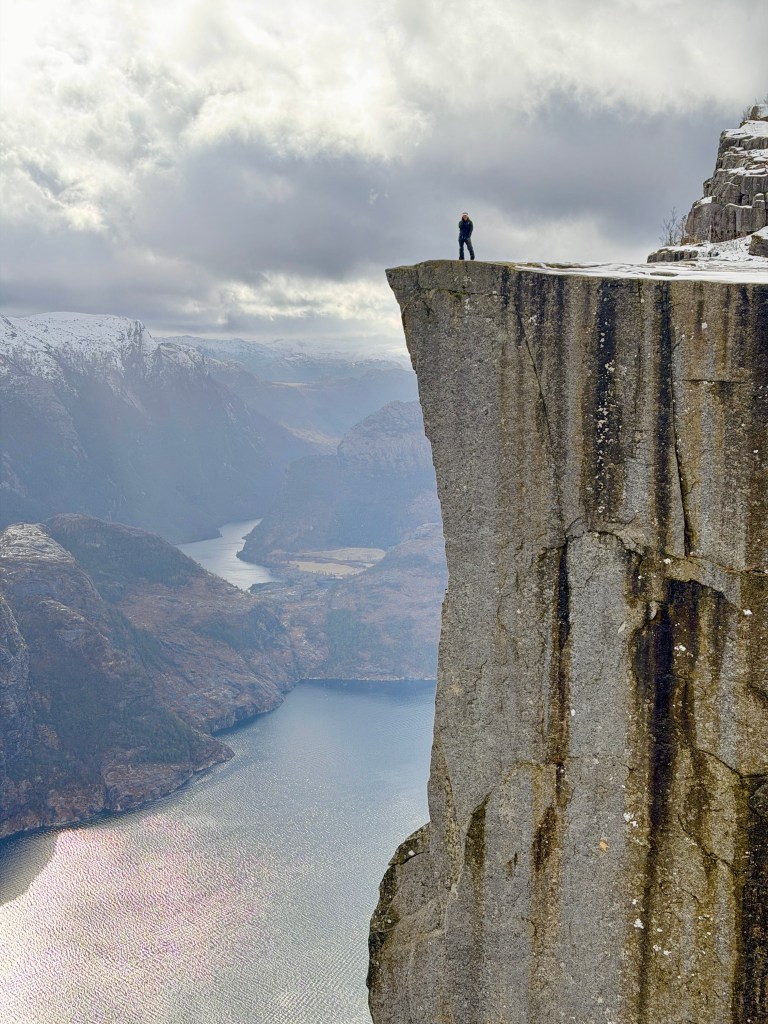
This day was centered around hiking, specifically Preikestolen, also known as Pulpit Rock.
This is one of Norway’s most famous hikes, sitting about 1,300 feet above the fjord. In the summer, it’s a straightforward hike, but in winter, conditions can be very different.
Snow, ice, and wind can make the trail more difficult, and in some cases, guides may be recommended or required. We purchased crampons prior to to our trip, there are also rentals available if the gift shop is open. Always check conditions before going.
We also looked into other options like local hikes such as Hatten, saunas, and nearby stops, but a lot of plans in this area depend on the weather.
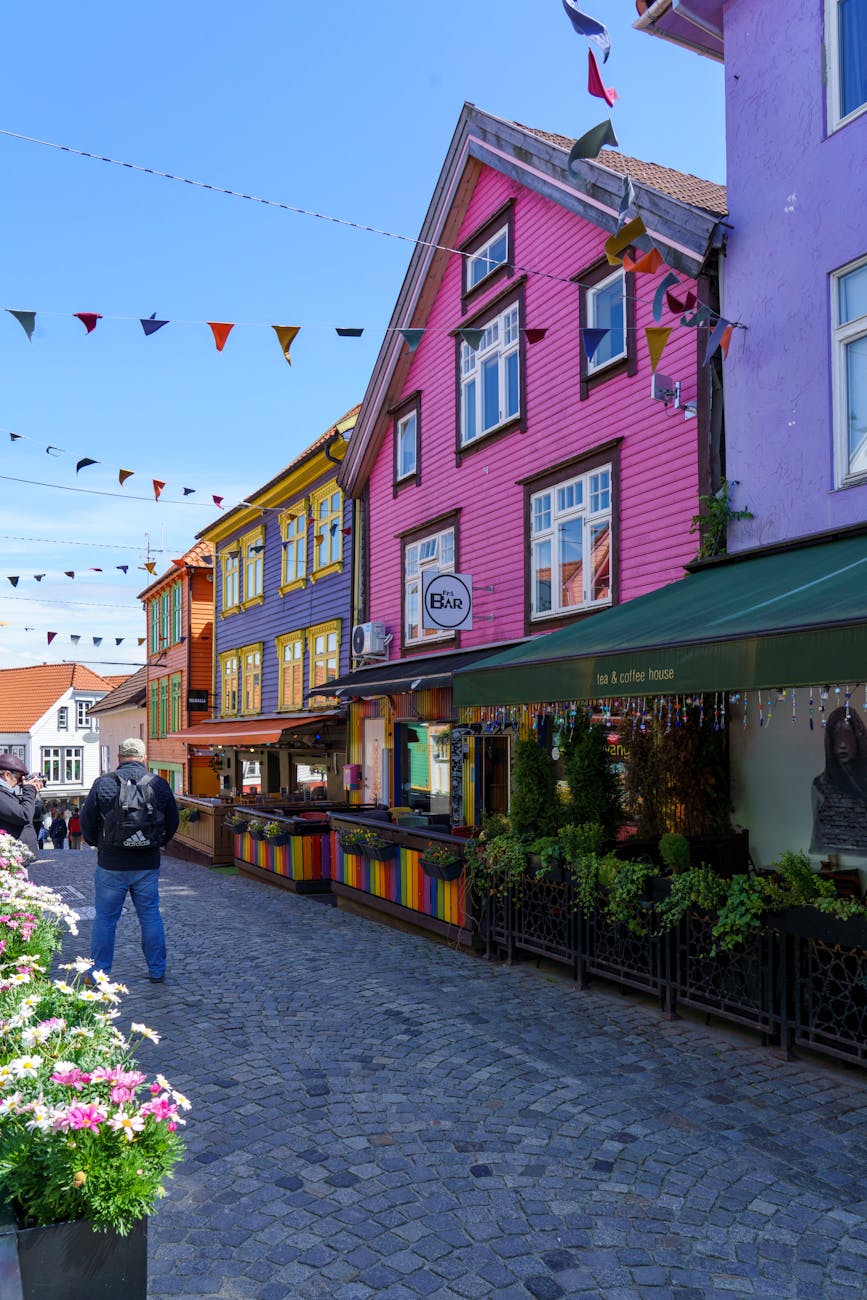
🏙️ Bergen
Bergen feels colorful, historic, and very walkable. It’s known for its harbor, surrounding mountains, and access to fjords.
How to Get There
We took the Fjord Line ferry from Stavanger to Bergen. This was one of the more relaxing parts of the trip and a great way to see more of the coastline.
Where We Stayed
We stayed in Bergen city, which made it easy to explore everything on foot.
Day 7 – Exploring Bergen
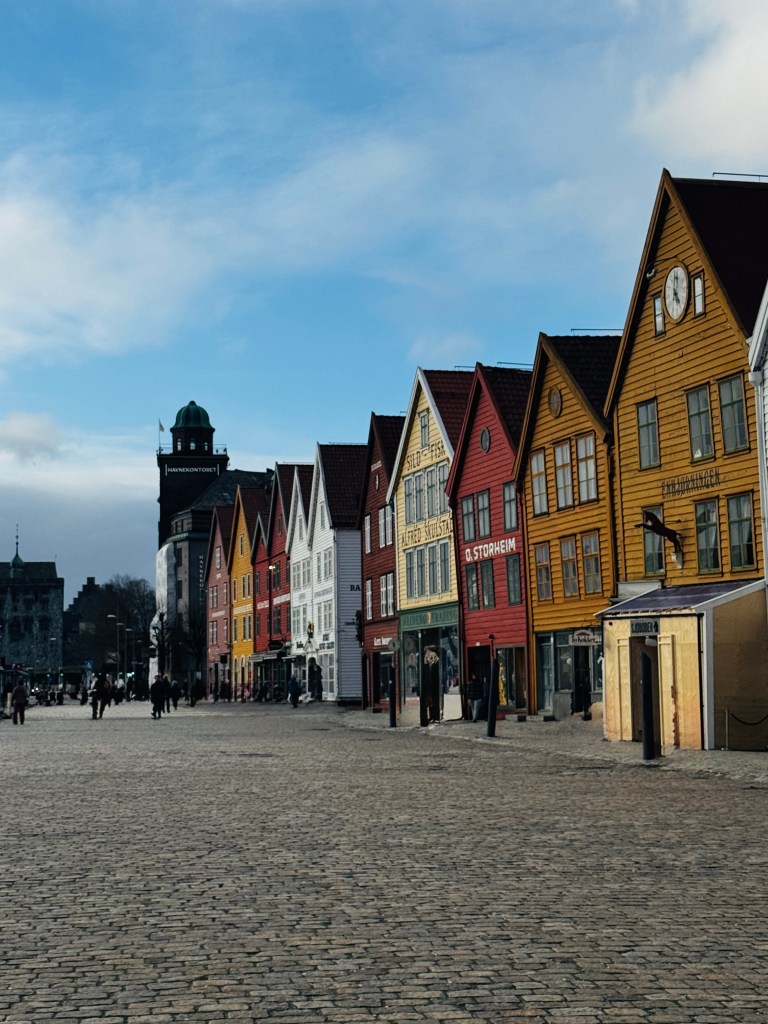
We spent the day walking through Bryggen, the historic harbor area, and exploring the surrounding streets.
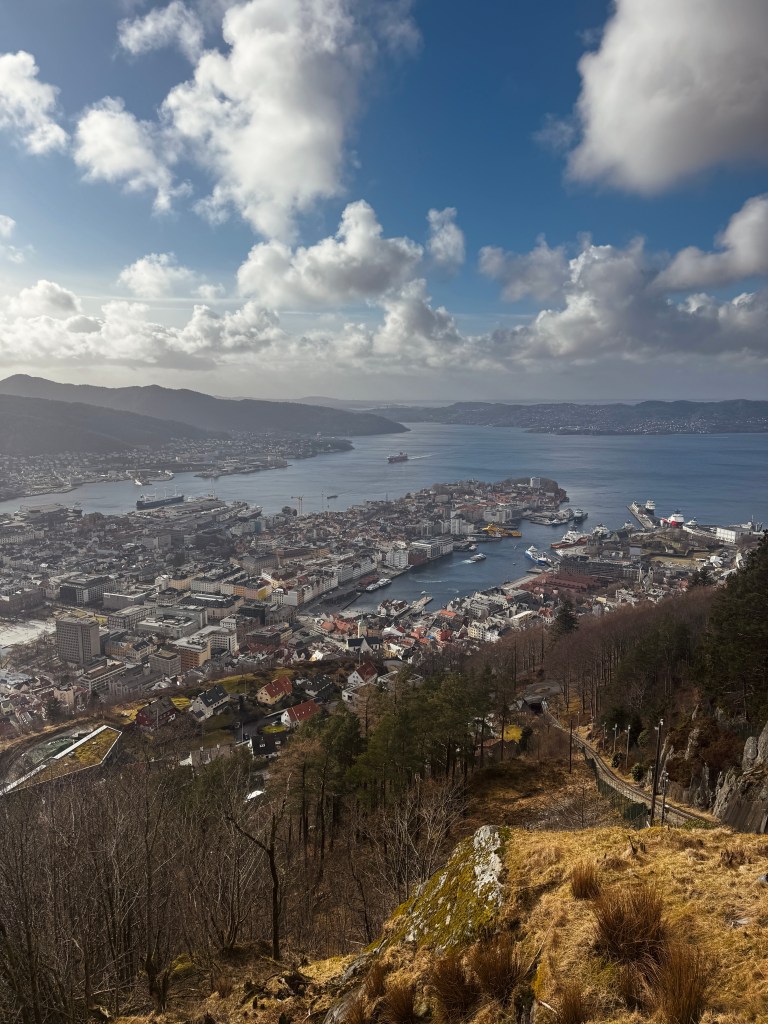
One of the highlights was taking the Fløibanen funicular up to Fløyen for panoramic views over the city. Another option if you have time is, Ulriken for another viewpoint, which gives a higher overlook of Bergen.
Bergen is a great mix of history, views, and local spots, and it’s very easy to explore in a day.
🏙️ Oslo
Oslo has a completely different feel from the rest of the trip. It’s more modern, more city-focused, and a nice contrast after spending time in nature.
How to Get There
We flew from Bergen to Oslo, which is the quickest and easiest option. Only a 45 minute flight.
How We Got Around
We used public transportation here instead of renting a car, which worked really well.
Where We Stayed
We stayed in the city and explored mostly on foot and via transit.
Day 8 – Arrival
We kept this day relaxed and explored the area around our accommodation. There is a variety of different cuisines from local Norwegian to Thai.
Day 9 – Exploring Oslo
We spent the day exploring different parts of Oslo and mixing in a few unique stops. One of the more unexpected ones was Pentagon Army, where we actually found a Viking-style helmet, which made it a fun and memorable stop.
We also visited the Munch Museum, which is a great indoor option and gives some insight into Norwegian culture and art.
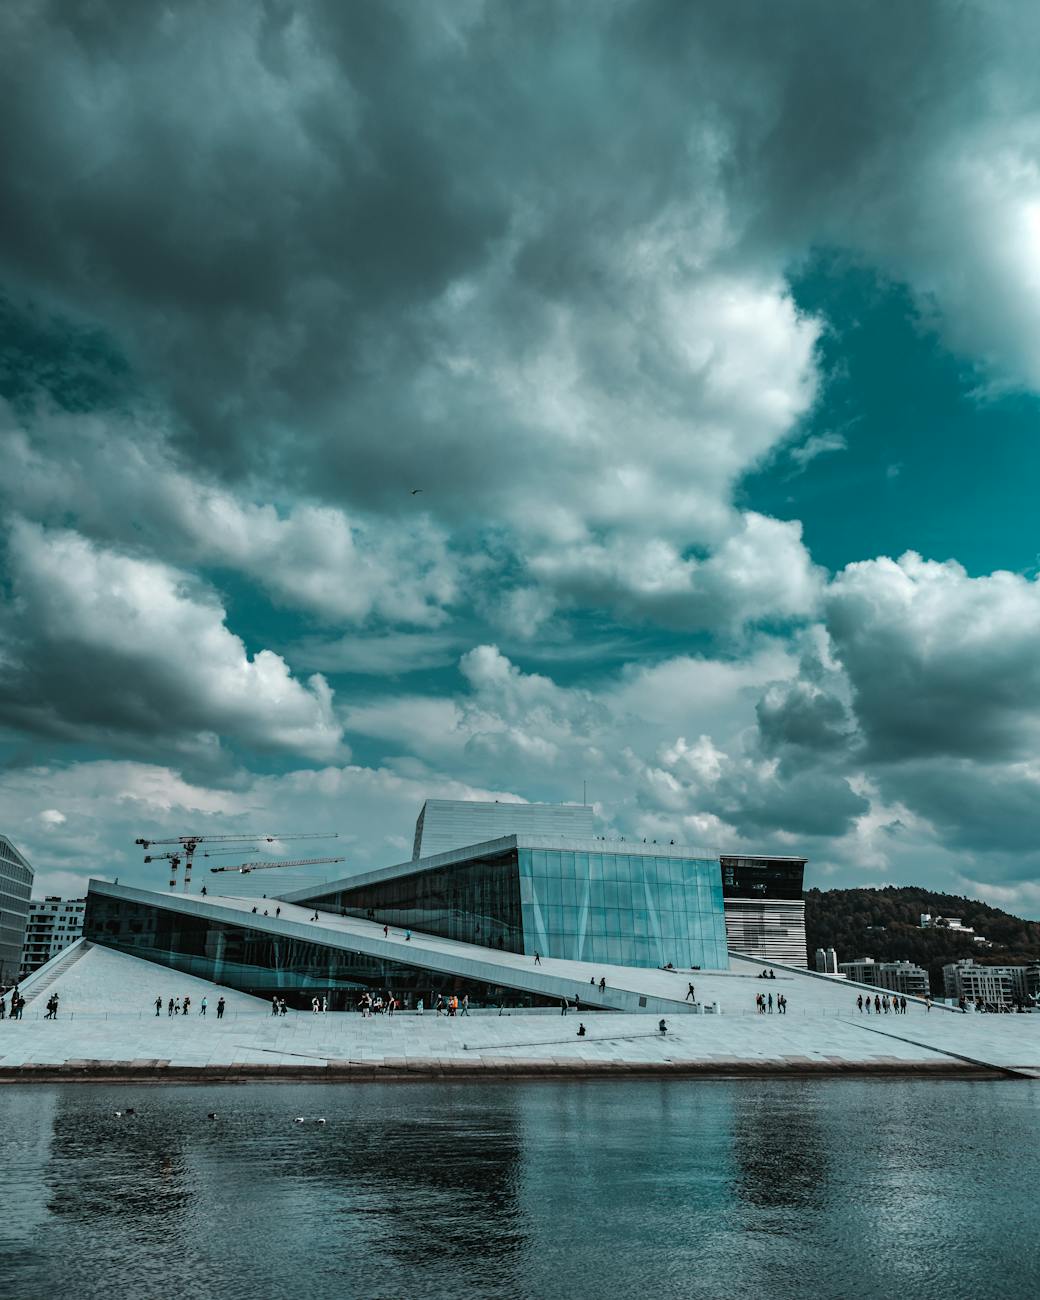
We ended the day at the Oslo Opera House, where you can walk up the roof for views over the city and fjord. It’s a simple stop, but one of the most iconic in Oslo. I recommend booking a show in advance.
🛫 Day 10 — Fly Home
🌌 Northern Lights Note
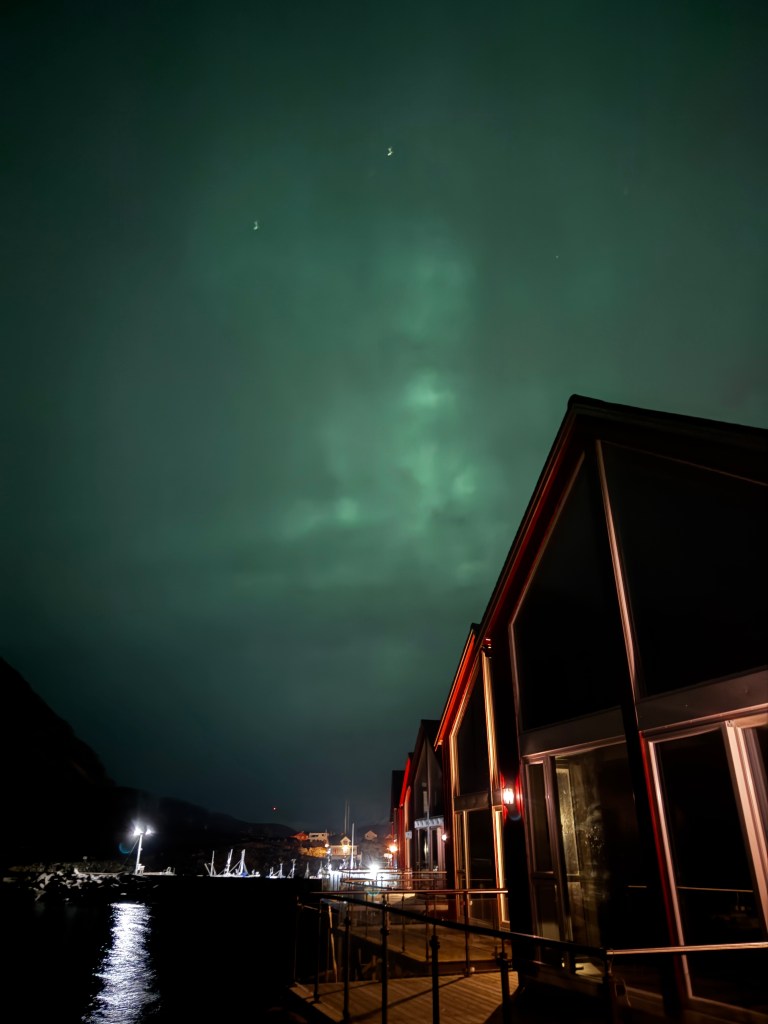
We didn’t get a full Northern Lights experience, which can happen, even in peak locations like Lofoten. I recommend using the Aurora Forecast app to track how strong the light will be in your area.
👉 We did catch a small glimpse one night, but visibility is never guaranteed.
🌡️ Weather in Norway (Beginning of March)
- Temperatures: ~20°F to 35°F (-6°C to 2°C)
- Frequent wind, snow, and icy conditions
- Short daylight hours
- Rapid weather changes
👉 Conditions can change quickly, especially in Lofoten and hiking areas.
🧳 Packing List for Norway in Winter
If you’re going in early March, pack like it’s full winter:
Clothing:
- Thermal base layers
- Insulated jacket (heavy winter coat)
- Waterproof outer layer
- Sweaters / fleece layers
- Warm hat, gloves, scarf
Great brand options that I like include L.L. Bean, Columbia, North Face, Cotopaxi or Rei Co-op.
Footwear:
- Waterproof boots
- Wool socks
- Crampons / traction spikes (HIGHLY recommended)
Extras:
- Portable hand warmer
- Sunglasses (snow glare)
- Backpack for day trips
- Portable charger (cold drains battery fast)
✨ Final Thoughts
Norway is one of those places that feels unreal the entire time you’re there. It does take planning, especially in winter, but it’s 100% worth it.
From the rugged landscapes of Lofoten to the fjords of Stavanger and the charm of Bergen, this trip is packed with experiences you won’t find anywhere else.
If you’re planning a trip, take your time, build in flexibility for weather, and be ready for an adventure.